

The internet is full of misleading info about broken exhaust studs on Harleys, but there is very little to be found about exhaust leaks at the port. An improperly sealed exhaust port can lead to bigger problems.
Harley-Davidson has gone to great lengths to describe the proper way to torque the special locking flange nuts on exhaust studs. Do it that way, and you’re 90% less likely to suffer stud breakage. Ignore that wisdom or use the wrong nuts, and there are often unfortunate consequences.
Some owners are concerned about the seemingly light factory torque specs (never more than 10 lb-ft) for these nuts, but keep in mind that they tighten considerably onto the flange when the engine gets hot. The flanges are designed to slide back and forth under the exhaust nuts when temperatures rise and fall, a simple self-adjusting mechanism.
Over-tightening flanges leads to warping and bowing during and after heat-cycling. If they get hot enough, the edges of the bolt holes begin pressing against and gouging the exhaust studs. Side-loading exhaust studs results in metal fatigue and breakage.
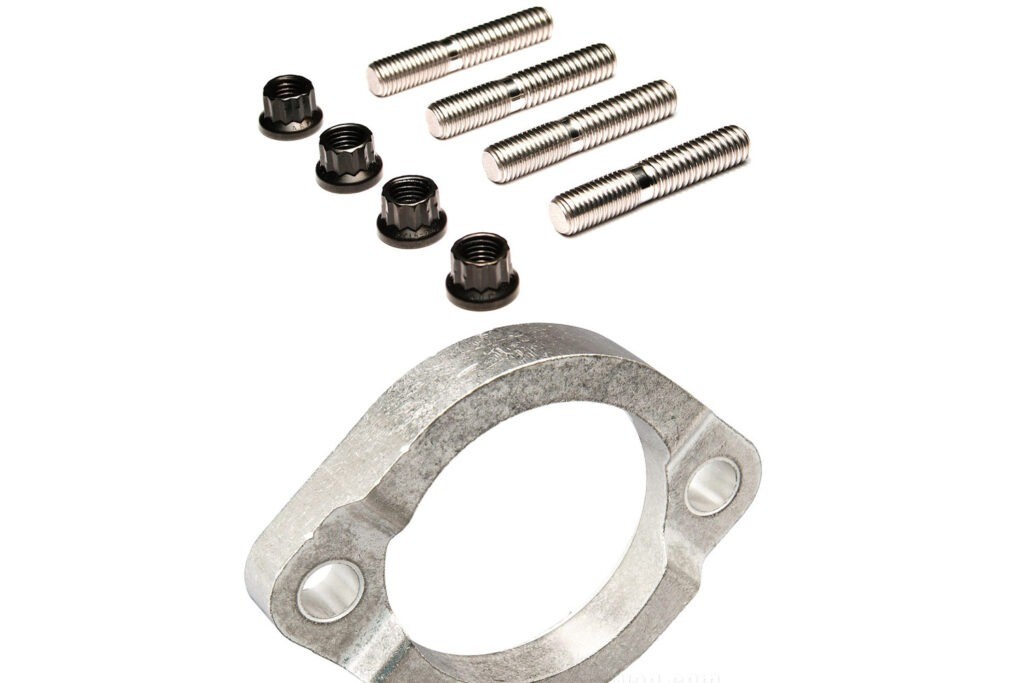
Flanges come in three basic variations. There are chromed types, which have been around since the early 1980s, and there are similar styles constructed from different materials. And then there are the shouldered heavy-duty type (65184-02), which in some applications only works with OEM head pipes.
OEM exhaust studs can be more vulnerable than some other aftermarket choices because they don’t always have enough relief between the coarse threads and fine threads. The factory studs (16715-83) have been augmented by an updated stud (10900015A), which adds a hex-shape protrusion on top to facilitate installation/removal.
Studs with rolled threads and a central shank (preferably with reduced “waisted” diameter) can better survive lateral pressure from expanded flange mounting holes. Chromoly and stainless-steel stud materials are also less brittle.
Tips: Check flanges before reusing them. If warped, replace them. Centering the flange is critical. A good mechanic will hand-file mounting holes to elongate for optimal fit or chamfer the holes to avoid sharp edges, with the goal of minimizing potential contact points with studs. Tightening when a mount hole is already touching a stud almost guarantees a break.
If an exhaust stud breaks and if there is enough of a stub left in the port, the stud can be extracted with vise-grips, by welding a nut to it, or by cutting a slot in it for removal by screwdriver. If the broken stud is inaccessible, use a purpose-built stud-extraction tool or, as a last resort, take it to a professional.
Choice of flanges, studs, and nuts – while important – is secondary to careful installation. Do your best to ensure flanges are not going to shape-shift too much when hot and centering the studs in flange mounting holes to avoid undue lateral loads from heat expansion. Be sure to correctly and evenly torque the retaining nuts, which will pay off in leak-free, trouble-free, and studly exhaust mounting.
See more Tech Tips installments here


Too many Techs buy top of the line torque wrenches, and then leave them in the toolbox. It takes little time to check torque specs BEFORE doing even a “simple” job. If they’re honest, at least 80% of bike Techs have no idea why they see broken studs. Excellent piece.