Küryakyn Saddle Shields
Küryakyn
Reflective Smoke 1118 (pair) $69.99
www.kuryakyn.com
877.370.3604
Paaaarrraade rest! On a Harley. In traffic. Damn, that engine is hot!
“Oh, the locals never use Sunset Boulevard. It’s always a parking lot,” I was told after I survived the ordeal. If the locals never use it, who are all those people in LA with California license plates on vehicles sitting in traffic going nowhere? Tourists in rentals? Oh, that’s me, but I’m a tourist on a rental, an ’07 Road Glide, via Harley’s Fly & Ride program in Los Angeles. That was my initial encounter with the tremendous amount of heat generated by that big honkin’ Twin Cam 96 when it has no cooling air passing over its cooling fins.
The Ormond Strip during Bike Week in Daytona was my next encounter of the extremely hot kind. I was on my own ’07 Road Glide, sitting in an area of congestion, feeling the heat, but not being able to escape the kitchen. The locals probably know their way around to avoid the congestion on the Strip, but they did not share that information with me. By the time I reached Destination Daytona, my legs were about medium well done.
The Küryakyn tent had only one set of their Saddle Shields left for sale. I bought ’em. I had seen these things on other Harley touring models, and when I had the opportunity to query the owners, they indicated that these Saddle Shields do make a difference. What I neglected to ask was, “How involved is the installation?”
For somebody who’s not mechanically inclined such as myself, the installation sheet was somewhat intimidating, especially when the hardware kit included: 10-32 x 3/4″ Button Socket Cap Screw, 10-32 Well Nut (Rubber Casing), Push-In Adapter Pin, Screw-In Adapter Pin, Cyanoacrylate (Yikes!) Gel Adhesive. Cyanoacrylate Gel Adhesive not withstanding, I proceeded with Step 1. “Determine which is the left and right Saddle Shield. See PIC 1.” Cool. Without the picture I probably would still be staring at these things trying to figure which way was up.
Step 2 “Remove the saddlebag (if so equipped); seat and side fuse panel cover. See PIC 2.” OK. Step 3 “Locate the hole in the frame to the left and slightly towards the rear of the bike from the Torx bolt that secures the rear tank tab. Insert the long end of the supplied 10-32 Well Nut into this mounting hole.” Huh?
Of course, Step 3 had no picture, and made no sense to me since the frame on the ’07 Road Glide is covered with what appears to be a pair of electrical bundles encased in plastic. So, I had to recruit a neighbor to pry the wiring bundles out of the way to find the holes in the frame, so I could install the 10-32 Well Nuts. I then aligned the bottom holes of the shields with the fuse panel cover fastener holes, and replaced the fuse panel covers, thereby securing the back sections of the shields. I would highly recommend following all of the installation steps since Küryakyn will not warrant components that are lost due to improper installation.
We’re only talking about a couple pieces of plastic, albeit expensive pieces of plastic. However, I would also recommend checking the security of your side fuse panel covers after a sprightly highway romp. I tried using the Cyanoacrylate Gel Adhesive to secure the Push-In Adapter Pins on my side covers for greater security. My experience was that the Push-In Adapter Pins did not adhere to the side covers using the supplied Cyanoacrylate Gel Adhesive. Although the shields are kept in place at the top with the well nuts, the bottoms at the side covers occasionally need to be tapped back securely into place.
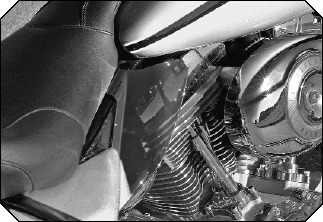
The Saddle Shields are cool looking pieces of plastic. Depending upon your angle of view and the light hitting it, the color varies from a smoked transparent plastic heat shield, to an opaque reflective silver look. (Think mirrored sunglasses on your local county mountie.)
So how do they work? Just for your benefit, I rode all the way from Kansas City, Missouri, to South Padre Island, at the bottom end of Texas, so I could sit in traffic and test them out. In South Padre, even though the temperatures were up into the 90s, there was a consistent wind of 20 to 30 mph blowing past the engine cooling fins. Also, during the weekend, there wasn’t any significant traffic congestion to hinder progress, so the Twin Cam 96 didn’t heat up enough to be annoying: however, that was probably due to the shields working their magic and I didn’t even realize it.
For a different perspective, when I got back home, I coerced my wife to go riding with me in the heat of a Missouri summer afternoon. She immediately noticed the benefit of the Saddle Shields deflecting some of the heat away from her legs. All of the other riders of ’07 Harley touring bikes whom I have found using the Küryakyn Saddle Shields have praised the shields’ effectiveness of keeping some of that excessive Twin Cam 96 engine heat off the riders and passengers. I found it interesting that Harley has just introduced their own heat shields, but they cost 20 bucks more than Küryakyn’s.
If you have one of those “hot” TC 96 Harleys, do yourself a favor and check out Küryakyn Saddle Shields to help deflect some of that heat away from your legs.