
If the cam chain tensioners on your 1999–2006 Twin Cam engine have lasted 30,000 miles, consider yourself lucky, and be aware that it’s time to replace them to save yourself a lot of trouble and expense on the road. Since the engine has to come apart to replace the spring-operated original style units, now is the time to go for a great upgrade that will increase the life of your tensioners, and provide many more trouble-free miles.
Before you start, there are some things you need to know: The factory recommends that you have the installation done professionally. There are some special tools you’ll need to do the job, and you’ll have to follow the instructions in the kit, so don’t throw them away. You’ll also need a factory service manual for additional instructions, torque specs and torque sequences. If you’re a novice mechanic, it’s also a wise idea to take your own pictures as you disassemble the engine components for reference when you start the reassembly. Before you take anything apart, clean the engine thoroughly to remove any dirt or sand that could fall into the open components and cause a problem later.
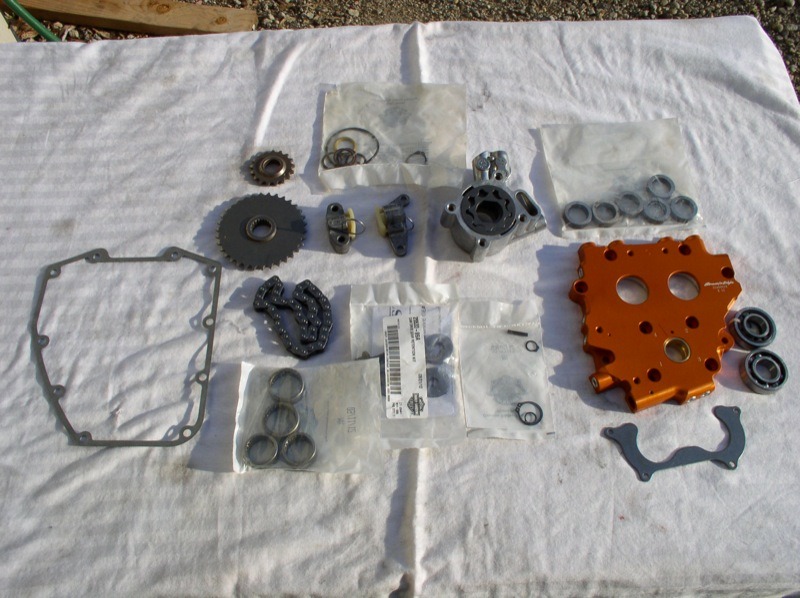
After some tensioner trouble on my wife’s trike on the way to Sturgis, I decided to upgrade to the hydraulic tensioners, and ordered the kit from Screamin’ Eagle (Part #25284-11). It came with most everything you need, but a spacer kit (Part #25285-08) is also recommended, so pick one of those up too (Fig. #1).
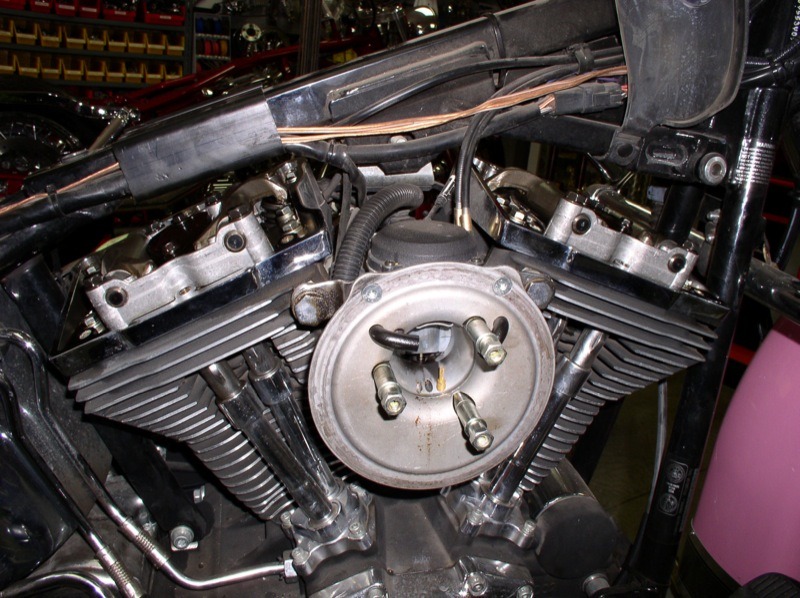
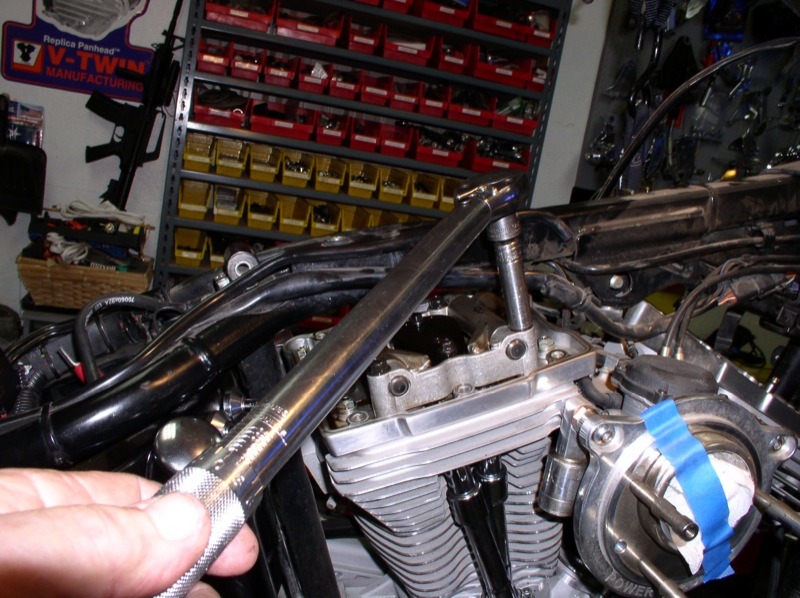
I decided to re-use my factory pushrods instead of cutting them and replacing them with adjustable pushrods, which is an option that saves you from pulling the rocker boxes and rocker arms apart (Fig. #2). It took a little more labor in the disassembly and assembly process, but I thought it would be wise to check the condition of the rocker arms, the pushrod ends and the lifters while I had the engine apart. Everything looked fine, so I cleaned the parts and set them aside on a clean towel. Cleanliness is a top priority during this process, so keep your hands clean at all times, too!
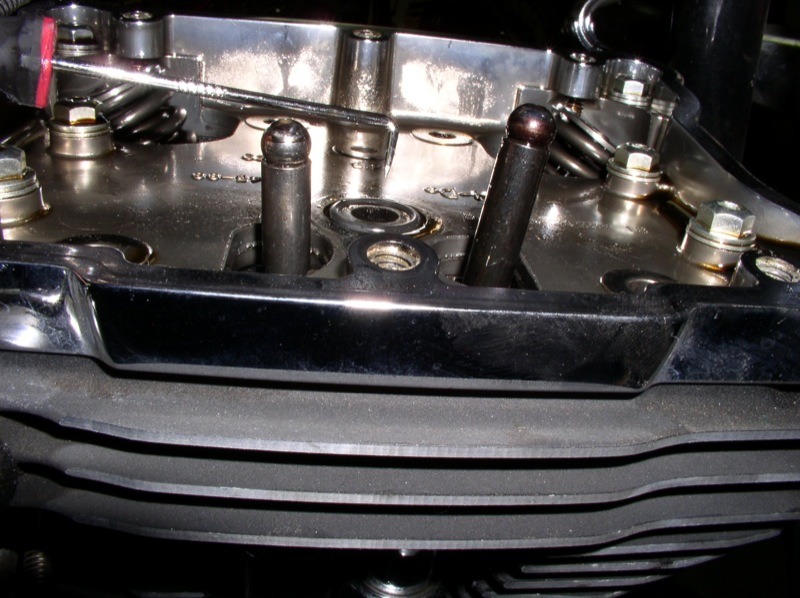
I started by draining the oil, disconnecting the battery and removing the fuel tank for access to the rocker boxes. I removed the rocker arms, loosening the bolts in a cross pattern to keep the assembly from twisting due to valve spring pressure on the open valves. I pulled out the pushrods, and removed the tubes, the lifter blocks and lifters. If you’re going to reuse the cams, make sure the lifters go back in the same spot. Notice the position of the pushrods; the intake pushrods are silver, and the exhaust pushrods are black. Be sure they go back in their respective positions (Fig. #3).
After cleaning off any accumulated dirt, I removed the outer gear case cover and the bolts that hold the timing gears in place. Harley-Davidson makes a special tool for holding the gears while you remove and reinstall these bolts (Part #94076-09 for roller chains, and #94077-09 for silent chains), but it was a weekend, so I made my own from a piece of square tubing (Fig. #4). It worked, but I recommend getting the proper tool from Harley-Davidson.
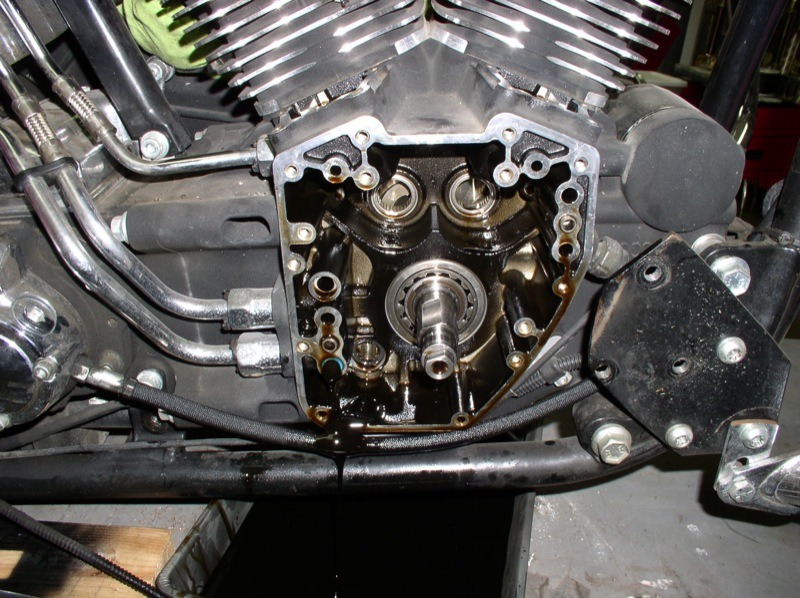
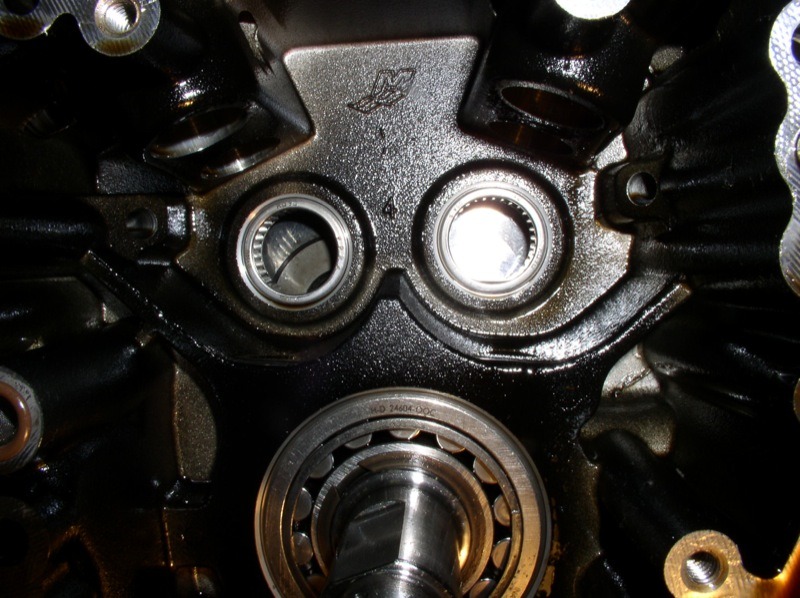
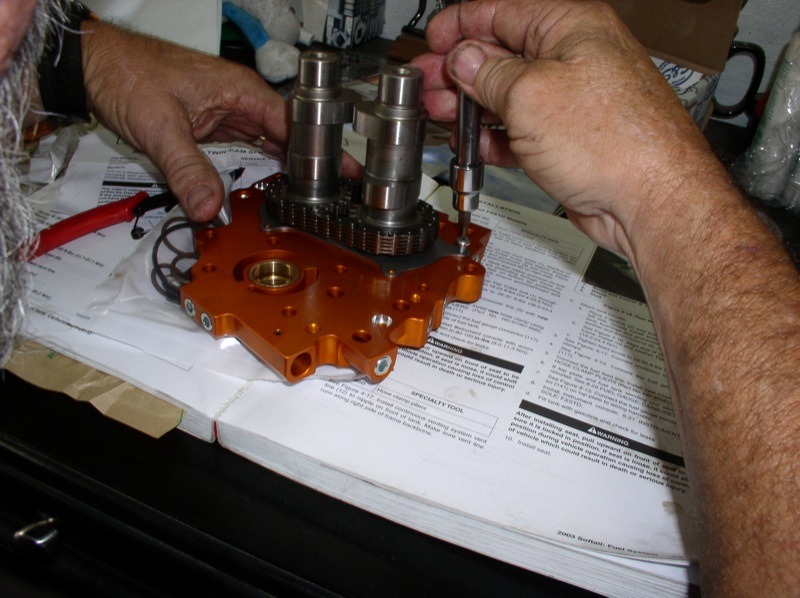
After the gears and chain are off, remove the cam support plate and cams, and the oil pump. Now that the cam chest is empty (Fig. #5), clean it with some Chemtool spray and inspect the area. You should always replace the inner cam bearings while the engine’s apart, and new ones come with the kit (Fig. #6). This part of the operation requires another special tool (Part #94085-09), and I highly recommend having it done by the dealer, or a shop with the right tool. You could get the bearings out with a homemade contraption, but if any of the needle bearings fall into the crankcase, the engine has to come out and be completely disassembled, adding expense and downtime. The dealer only charged a minimum (about $40), and it was well worth it.
For the next part, you’ll need a press of some sort. I used my hydraulic press, but an arbor press will work fine, as well. Remove the snap ring from the outside of the front cam. Put the cams and plate in the press with the cams facing down and support the cam plate on both sides of the cams. I used a deep socket slightly smaller than the exposed end journal on the cam and pressed the front cam out of the bearing. The rear cam will slide out of its bearing as the front cam comes out. Be sure you keep a hand under the cams so they don’t fall and get nicked or damaged! You’ll reuse the cam chain, so inspect it, too, and mark the direction of rotation with a felt pen so it will remain the same on reassembly.
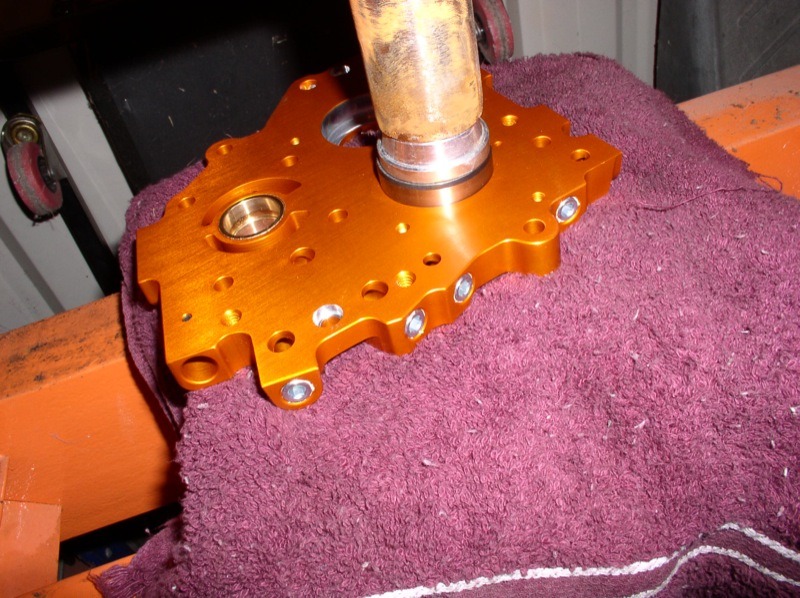
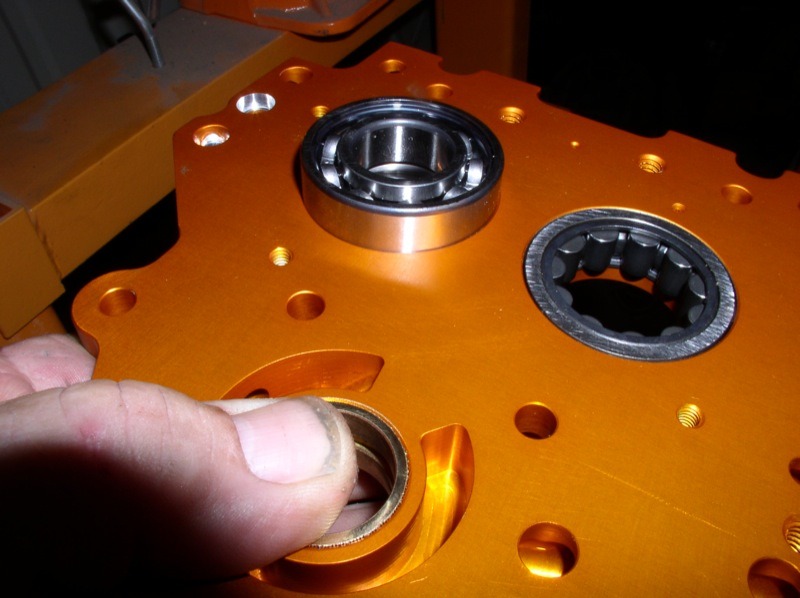
Next, support the new billet cam support plate and press the bearings into place, being careful to keep them flat and even as they go in (Fig. #7). Remember, the ball-type bearing is for the front cam, the roller bearing for the rear cam (Fig. 8).
If you’re replacing the cams, you’ll need to replace the inner race for the rear cam bearing. It comes in the kit along with a washer/spacer and an O-ring. The O-ring goes on first, then the washer and, finally, press the race into place on the cam journal. Before you bottom it out, be sure the O-ring and washer are centered. Once the race is installed, you’re ready to install the cams. Install the bearing retainer plate, and use a drop of blue Loctite on each screw (Fig. #9).
Put the cams into the chain so the timing marks face each other. They must line up exactly, dot to dot. I used a 1″ socket to support the front cam bearing, and slowly pressed the cam into place. If you go slow and keep the cams aligned, the rear cam will follow the front into its bearing without any effort. If the rear cam binds, don’t force it; just start again. Once the cams are in place, put the snap ring on the front cam so you don’t forget it, and install the rear chain tensioner, using blue Loctite on the screws. Double check the alignment of the timing marks on the front of the cams.
Next, replace the scavenge side O-ring where the oil pump will slip into the case, then align the flat surfaces in the

oil pump to mesh with the flats on the crankshaft. Slide the pump into place, and be sure the bottom of the pump slips all the way into the scavenge side O-ring and sits tightly against the case. Replace the two O-rings on the left side of the case. There is a screen under the top O-ring, and now would be a great time to clean and inspect it.
Slip the cams and the new support plate into position and start the bolts, leaving the four oil pump bolts loose as you tighten the support plate bolts to specs, and in sequence (Fig. #10). With any aluminum part, the sequence is very important, so follow the instructions precisely. Also, make sure you have both an inch/pound and a foot/pound torque wrenches, and carefully read which one to use for each step in the reassembly process!

Leave the oil pump bolts a quarter-turn out from snug, then rotate the engine (using the back wheel with the transmission in gear) as you snug the oil pump bolts in sequence so the oil pump can align itself, then torque the bolts to specs.
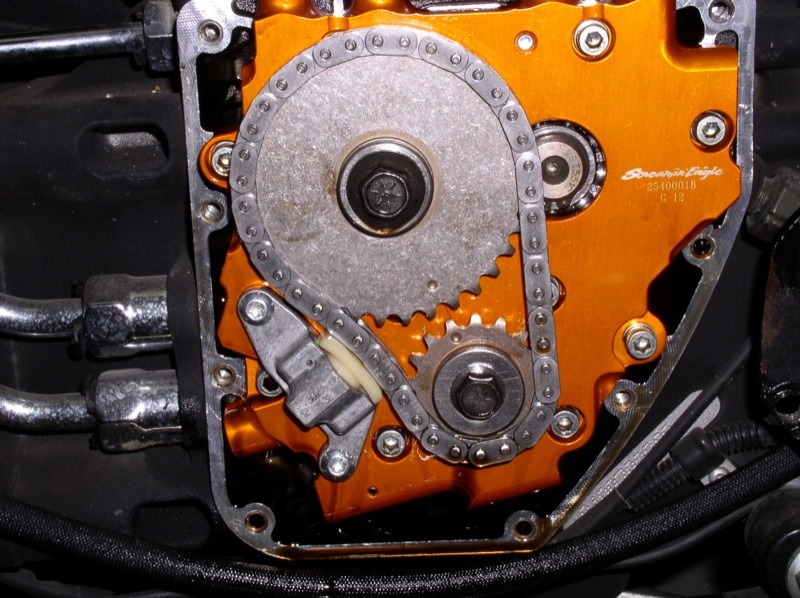
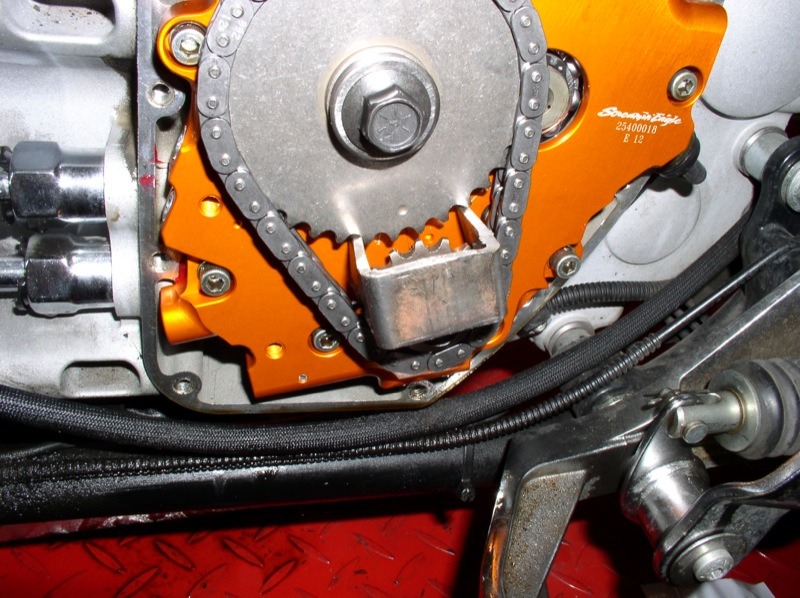
Install the timing gears and chain, and check alignment with a straight edge (Fig. #11). Use the spacers from the spacer kit behind the cam gear until you find the one that’s the proper thickness to bring the gears into alignment, then torque the bolts to specs and install the outer tensioner (Fig. #12).
Install the outer gear case cover and gasket and torque the bolts to specs. If you cut your old pushrods, install the new adjustable pushrods and adjust according to specs. If you disassembled the top end like I did, just install as per instructions in the factory manual, and torque to specs and in sequence (Fig. #13).
If you noticed that the photos are of two different engines, you’re right. I was so pleased with the kit I installed in Reggie’s trike, I ordered one for my Softail, as well. Now we’re both set for a lot of trouble-free miles!


Hello!-
I installed the twin cam hybrid cam plate and hi flow oil pump with the 2005 stock cams.
The hydraulic tensioner was used in the front and the spring tensioner in the back, as outlined in the instructions for the kit.
Should I want to go with new cams with hydraulic tensioners front and rear, is there something that must be done to permit oil to flow to the hydraulic tensioners in the future?
Would greatly appreciate some comment re: this situation.
Thanks
I know this post is three years old, but why didn’t you use the hydraulic tensioners on front and rear?
I have an 06 twin cam 88 b, and plan on buying this kit, thinking that it replaces both front and rear tensioners to the new hydraulic setup..
You stated in the instructions it told you to reinstall old Spring style tensioner in the rear, and the hydraulic tensioner in the front is that correct..
It seems like that would be defeating the point of changing to hydraulic tensioners if you’re only using one,, again I know this post is old but thank you.. S..
I was thinking the same thing lol
Hi i need help i instold the kit(hi flow oil punp with the screeming eagle plate )on my 2004 road king and when i start the bike there is no oil pressure and the oil led still on. So any one can help me ?
It sounds like your oil pump is not lined up correctly on the crankshaft,, when you push your oil pump on make sure you hear it click into the gasket, and as you’re torquing down the oil pump bolts, slowly rotate the rear tire while it’s in 5th gear to align the GE rotor gears.. or install your oil pump one piece at a time so you can physically see all your Flats inside the pump lining up on the shaft.. hope it all works out, just did this job on my 06 Softail,, and went with the new Screamin Eagle hydraulic cam upgrade kit..
Did any of that info I sent you help at all?
I’m assuming you’re either got your scooter put back together, or you took it to the dealership and pay them $1,600,, if you followed this guy’s instructions above you never get the job done right
All the special tools you need you can rent from Auto Zone,, one area this guy screwed up on
Blessed by saying if you’re changing out your cams you need to replace your inner rear cam bearing sleeve washer and a ring the O-ring goes over the end of the shaft and keeps everything aligned,. This process still has to be done even if you’re going to continue to use your existing cams,, not only if you’re going to change them
Second you could rent a slide hammer and blind hole bearing remover tool,, and also a bushing installer kit from Auto Zone,, and save yourself that so-called $40, there’s not a Harley dealer around they wouldn’t charge you a minimum of an hour maybe two the change out your inner case new Torrington style B 148 bearings,
Send me a text if you got it fixed or you took it to the shop,, keep the rubber side up. 👍
I am installing a Screaming Eagle Cam plate on my 2002 Road King and do need to know what the torque spec are for the hydraulic tensioner bolts. Thanks you,
Lance