
Performance Machine
#0206-2114-SMB, $499.95
performancemachine.com
There are tons of good reasons for bolting up a new air cleaner on your motorcycle. Sometimes it’s part of the larger quest for more speed and power, where getting the right quantity of air in smoothly can make the difference between a bike you love to ride and one you hate to wrestle with. Or maybe it’s just a style concern—a new dash of style to kick off the new riding season or a touch of class to complement a new paint job.

The first project I ever did on my bike was to change out the factory air cleaner in the driveway of my apartment, to get more familiar with my machine and to build my confidence. And years later, we’ve come full circle. With a long list of modifications and upgrades planned for my ’96 Sportster over the winter, the hardest part was getting the project moving. But harkening back to the first humble driveway project, I decided to get the ball rolling with the handsome JET Air Cleaner from Performance Machine. It’s directs airflow internally in a very similar fashion to my previous setup, but features a level of detail and styling that’s uncommon in the aftermarket. Also of note is the fact that the part is machined right here in the USA, like the majority of Performance Machine’s major components and accessories.

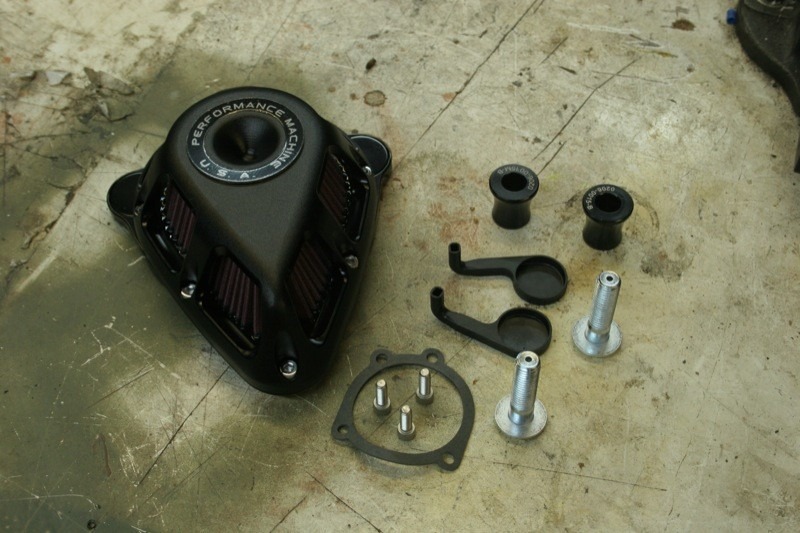
Right out of the box, it’s obvious that Performance Machine isn’t interested in cutting corners. I chose the Black Ops finish, a handsome low-gloss black with a fine texture, which was handsomely applied. I was impressed by the uniformity of the finish, a difficult task with textured and low-gloss coatings. The JET air cleaner is also available in a classic chrome finish as well as Performance Machine’s signature Contrast Cut finish.
Installation was a straightforward affair, with the experience of many years wrenching on my side compared to the last time I did this job with only a flashlight and a set of cheap hex keys. Plus, the included instructions were detailed and clear, with color photographs to help me along the way. The first step was to remove my old air cleaner, taking care to save the old hardware and miscellaneous parts. You never know when another project might need an air cleaner.

Next came fitting the backing plate, where I encountered a small hurdle. I have an aftermarket dashpot cover on my carburetor from Jeremy Cupp at LC Fabrications, and it projects further on the right side of the motor than the stock plastic cover. With a little coercion with a fine file, I relieved the dashpot cover sufficiently without having to modify the finely-made Performance Machine part.

With the backing plate and breather fittings mounted, I had a choice to make. Somewhat uniquely, the JET air cleaner can be mounted with the tapered end pointing downward or to the rear of the motorcycle. After mocking up the part in both orientations, I realized that visual preference wasn’t the most important factor. On my compact Sportster with mid controls, the downward-pointing orientation left more room for my right leg, but on larger bikes with forward controls the other orientation may be preferable.
Even though it’s a simple project, the quality of the design and parts made this as seamless a task as can be hoped for. The result is an attractive centerpiece to the right side of the motorcycle, which has kicked my winter project into gear.


Hello Vincent,
I’m not sure if you still have this on, but how far out does it stick out from the mount?
I’m looking to put one on a 2014 XL1200C and I’m tired of hitting the ridiculous ham-can that Harley put on as stock.