FS Kit Front Fork Springs
Progressive Suspension Inc.
$92.95
www.progressivesuspension.com
I ran into David Zemla, the director of marketing for Progressive Suspension, at this year’s V-Twin Expo in Cincinnati. He asked me how I was enjoying the new set of front fork springs he had sent me. I had to admit that I hadn’t installed them yet. He asked if there was a problem. “Yes, I’m a stubborn dumbass who refuses to consult my service manual,” I replied. Not only was it an honest answer… it was my only answer.
My association with David began a year earlier when he recommended a pair of PSI’s 440 Series rear shocks for my 2003 Road King. I fell in love with them and the improved performance over the stock Harley air-assisted setup. Shortly afterward he had inquired if I was ready to upgrade my front-end suspension. Soon I had a box containing the company’s FS Kit, a progressively-wound set of coil springs that Zemla assured me would benefit my aggressive, long-distance riding style.
The kit utilizes the same construction that the company has become renowned for over the last 25 years—a progressively-wound profile. A coil spring is defined by its rate, which is the measurement of force required to compress the spring with that rate being expressed in pounds per inch. A spring rated at 100 lbs/inch requires 100 pounds of force to compress it one inch. In a straight (linear rate) coil design, each additional inch of compression requires a subsequent 100 pounds of pressure. But a progressive-rated coil spring is able to exhibit multiple ratings by the use of a varied spacing of the coils at one end. The initial one inch of compression may require 100 pounds of force but the subsequent inch would require more than an additional 100 pounds. The advantage of this rising rate of resistance is that the action is flexible enough to smooth out small highway irregularities but also capable of absorbing major bumps.
I initially attempted installation of these springs before my ride to Sturgis last fall. But with my usual mechanical machismo, I ignored the procedure for fork removal noted in my official Harley Service Manual. Oh, no; I approached the project in the same manner as I would have when switching fork springs on my Shovelhead—with a 12″ adjustable Crescent and a big rawhide mallet. Wrong. I fought that damn thing for two days while watching my extra road time tick off my Black Hills calendar. In frustration, I abandoned the venture and slammed everything back together with the stock parts intact just before hitting the road. Only later did I see Mr. Zemla on an Internet video performing the proper technique for swapping out a set of fork springs on a similar model. No way! It couldn’t be that easy, could it? I checked what David did against what was inscribed in my manual, and sure enough, they matched. So who can argue with David and the Motor Company? And it really is that damn easy—easy enough that anyone with an afternoon and a minimum of tools and wrenching experience can accomplish. But be advised that there are critical torque values for bolting everything back together—boring stuff that I’m not including in this article. But it’s important stuff, and your front end falling off is never cool. So if you’re uncertain of your skills, be sure to get a qualified mechanic you can trust. I’m told they still exist.
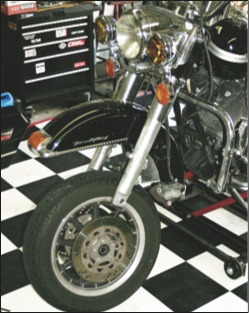
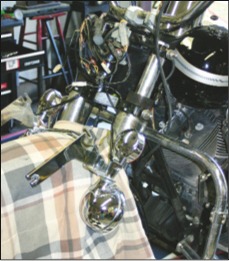
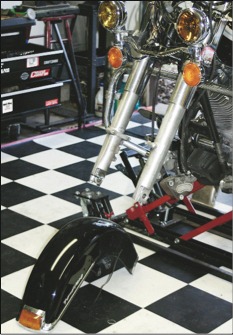
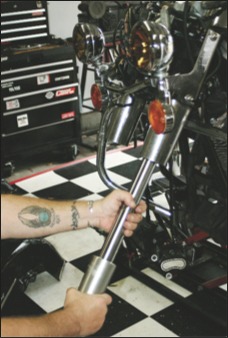
First, raise the bike with a stable motorcycle jack until the front wheel clears the ground by a good six inches. Remove the front wheel and let the brake calipers hang alongside the fenders (covering the front fender at this point with one of the comforters that the girlfriend left on her last visit would be a great safety measure—unless she shows up before you finish, of course). Drop the spotlight bar (Harley calls the unit a passing light assembly) and set it on the covered front fender. Remove the headlight and all its assorted rings and shells. Unbolt the two-piece nacelle. Hang the passing light assembly back on the four studs protruding from the triple clamps and remove the front fender. Loosen the two pinch bolts in the bottom triple clamp and slide the rubber fork stops up out of the way. Then spray the slider tubes above the lower triple clamp, allowing them to soak for a few minutes (I used WD-40 but surprisingly, the service manual recommends glass cleaner). Remove the fork cap from the fork tube plug (at the top triple clamp), remove the pinch bolt you loosened earlier and slide the fork assembly out. You may have to twist the slider if any moisture contamination has caused it to become stuck in the triple clamps. Repeat on the other fork leg assembly. Take a break, kick back and have a beer while you pat yourself on the back for a job well done so far. This beer break is also the perfect time to inspect your tire and brake pads, checking for possible replacement and to grease the bike’s neck bearings.
Harley sells a great little tool to firmly clamp the fork slider without marring the surface (Fork Tube Holder HD-41177). I couldn’t justify the cost of buying the unit for what may very well be one of the few times I ever perform this operation, plus the fork tube is completely hidden by the nacelle so any scratches wouldn’t be noticeable anyway. Instead, wrap several layers of that comforter around the slider and secure it in a bench vise (and keep praying she doesn’t show up). Using a large adjustable wrench, slowly loosen the fork tube plug. The plug is under pressure from the fork spring so keep a firm grasp on the plug and be prepared for it to pop out as it comes free (safety glasses would be a wise choice). Also pay attention to how tightly the plug was installed. The factory has a recommended torque value but since the plug has only two flats on it, it’s next to impossible to get any type of reading using conventional garage tools. Remove the old spring and drain the oil into a suitable container (pumping the lower fork and slider during draining provides the best results). The FS Kit is designed to fit a multitude of bikes, so Progressive provides a section of heavy-wall, 1″ PVC that is to be cut to the proper length for your particular model. The spacer will determine the ride height and fork pre-load. The spacer length listed on the Progressive chart was 1 7/8″ for my Road King. But I had some questions about calculating and fine-tuning the pre-load. So I called the Progressive technical hot line and answered a battery of questions: “How do you ride? Long distance or short? Freeway or backroads? Solo or two-up? More interested in comfort or performance?” And then the kicker, “How much do you weigh?” I answered honestly and Tech Wiz Justin instantly told me to cut the spacers to 2 3/8″. Wow. He also recommended that I switch to 15-weight fork oil instead of the stock 10-weight. More experience speaking. I selected Bel-Ray High Performance 15-wt. After cutting the spacers, any burrs can be removed with sandpaper or a pocket knife.
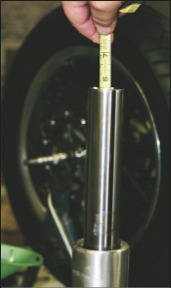
Before installing everything, the fork oil level must be set. The oil level is the distance from the top of the fork tube to the top of the oil with the fork assembly completely collapsed and the spring removed. Although my manual illustrated the use of a Front Fork Oil Level Gauge (HD-59000A), I found a tape measure to work adequately. Just add the oil a little at a time and take measurements along the way. The stated level in the manual is 5.24″ but due to the design of the Progressive spring, it will displace more oil and 5 1/2″ is the recommended height. I went with Progressive’s number. After you’ve set the oil level, extend the fork assembly fully and drop in the spring, with the tighter coils toward the bottom. (Although mechanically it makes no difference, having the closer-wound coils at the bottom makes for quieter operation.) After the spring, install the flat washer included by Progressive between the spring and the PVC spacer to reduce chafing. It’s advisable to replace the fork plug O-ring before installing the plug—I found a decent substitute at the hardware store and avoided yet another trip to the dealership. Then, while compressing the fork spring/ washer/ spacer assembly, thread the fork plug into the slider, and tighten it to 22-58 ft/lbs (I hope you remembered how tight that felt during disassembly.)
Installation of the forks and reassembly is basically a reversal of the disassembly procedure. But there are two important items to note. When you slide the fork tube assembly through the bottom triple clamp, don’t forget to replace the rubber fork stops on the sliders before stabbing the top triple clamp. And just as important (and possibly even more embarrassing), pay attention where your clutch cable is routed when installing the left assembly. (I suffered through both mistakes, causing additional headaches and lost time.)
The ride to Daytona and back was a typical Thunder Press fuster-cluck consisting of high-speed, 500–700 mile per day Interstate travel. But the Progressive FS Kit gobbled up the asphalt, while taming even the roughest sections of I-10. The kit provides a ride more responsive than stock with improved handling in the corners and long sweepers being the most noticeable. Gone is the plush Cadillac ride with more of a stiff, competition feel taking its place—a refinement appreciated by this rider. And packing two-up, the FS Kit shines even brighter, with no complaints from the passenger (although she’s still asking about that comforter). Progressive Suspension warrants their fork springs to be free from defects in materials and workmanship to the original owner for life. That’s a promise that will probably outlast the girlfriend.